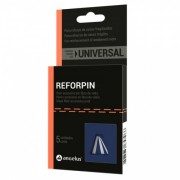
Angelus Reforpin Universal Pack is the solution for fragile roots
Glass fiber accessory postsADVANTAGES:
WARNINGS | PRECAUTIONS
The use of fiber pins is not recommended for extensive oral rehabilitations in patients with parafunctional habits of occlusion such as centric bruxism (clenching) and/or excentric bruxism (grinding)
For the correct use of direct posts, there should be at least a height of 2 mm of healthy remaining coronal dentin
Use cotton pliers to hold REFORPIN® . Do not use a hemostat or other pliers because it may macerate the post
REFORPIN® posts should only be cut with diamond burs on high speed under water cooling. Scissors and pliers cannot be used. Use eye protection and a mask to avoid inhalation of particles
All fiber posts must be covered, either by the cement or by the composite resin.
TECHNIQUE OF USE - ASSOCIATED TECHNIQUE (WITH MAIN POST)
A. ROOT CANAL PREPARATION
1. Use a Largo drill according to canal diameter. Since the root apex may present accessory canals, 3 to 5 mm of gutta-percha filling should be left intact to prevent bacterial contamination
2. Select and place the post according to Largo drill diameter
3. Fill all residual empty spaces with REFORPIN® to obtain a light interlocking of all posts. Record and rehearse the placing order of all posts (main and REFORPIN® ) before cementation
4. The excess in length of posts can be cut before or after cementation.
B. POSTS PREPARATION
1. Clean all posts with alcohol (main and REFORPIN® )
2. Apply a layer of a silane agent on the posts 1, 2 (picture B2). SILANO ANGELUS® is indicated for this step. Wait for one minute and gently dry with air.
C. CEMENTATION
1. Isolate the area, wash the root canal with an air/water spray and dry with air and absorbent paper points
2. Etch the root canal for 15 seconds with 37% PHOSPHORIC ACID ANGELUS
3. Wash the root canal and dry with air and absorbent paper points
4. Apply in the root canal and on the post the chemical adhesive, FUSION-DURALINK® CATALYST ANGELUS according its instructions. There is no need in mixing this adhesive, so there is no need of light activation
5. Mix a self-cured (chemically) or dual-cured resin cement* and fill the root canal
6. Insert the post in the canal, remove the excess of cement and wait for its polymerization. If the resin cement is dual-cured, light-cure it now
7. Cut with diamond drill in high rotation, under irrigation with water, the excess in length of the pins. Do not use scissors or pliers; Zinc-phosphate and glass ionomers (conventional and resin-modified) may also be used for the cementation of posts, but their properties are inferior to those of composite resin cements. Auto-adhesive cements eliminate the needs for the steps of acid conditioning and adhesive application 3,4 .
D. BUILDING THE CORE (CORONAL PART)
1. Re-etch the tooth structure and the post with phosphoric acid and apply a light-cured adhesive. Build the core with a restorative composite resin (hybrid, microhybrid or any specific composite resin for cores)
2. Reproduce the coronal portion according to the prosthetic preparation shape of tooth to be restored. Prior to making the temporary restoration, isolate the core with petroleum jelly (picture D2); 3. Core build-up after full-crown preparation
TECHNIQUE OF USE - REFORPIN - ONLY TECHNIQUE
This mode of use is specially indicated in teeth with very narrow or small root canals. The sequence of steps and the instructions are the same as those for the ASSOCIATED TECHNIQUE, with the only exception that a main post is not used. The root canal is totally filled only with REFORPIN® .


