FAQ'S
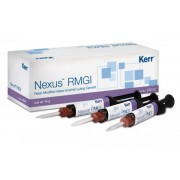
What is Nexus RMGI?
- Nexus™ RMGI is a radiopaque resin-modified glass ionomer luting cement
How is Nexus RMGI delivered?
- Nexus RMGI is offered in a paste/paste formulation and is packaged in dual barrel syringes with single-use regular automix tips. Wide automix tips are available for purchase in a package of 8 and additional regular automix tips are available in a package of 50. 35640 Kit 35650 Automix Wide Tips 33361 Automix Regular Tips
Is it only self-cure?
- No, this a dual-cure material. You can let the material self-cure or tack-cure prior to removing excess cement.
Is Nexus RMGI indicated for all types of restorations?
- No. Nexus™ RMGI is intended for use as a permanent dental cement. It is indicated for the following indirect restorations: Cementation of metal-based inlays, onlays, crowns and bridges Cementation of resin inlays, onlays, crowns and bridges Cementation of all ceramic inlays Cementation of high strength (zirconia based) all ceramic crowns and bridges Cementation of metal, ceramic and fiber posts
Are there any contraindications?
- Yes. Nexus RMGI is contraindicated for pulp capping. In addition, this product is not to be used on veneers or all ceramic/porcelain crowns and onlays. In rare cases, the product may cause sensitivity in some people. If any such reactions are experienced, discontinue the use of the product and refer to a physician.
Can the automix tips be used on multiple patients?
- No. Automix tips are for single patient use only, to prevent cross-contamination between patients.
When can I remove excess cement?
- When the restoration is properly seated, remove excess cement. Excess cement is best removed in its gel state with a scaler or explorer. Gel state can be achieved by tack-curing excess with a light for approximately 2-3 seconds, or by allowing the cement to self-cure until it feels rubbery.
What is the set time?
- Set time is less than 4’30” at oral temperature. These times may vary based on storage conditions, temperature, humidity, and age of product.
What temperature do I need to use this product at?
- This product is designed to be used at room temperature.
Can I refrigerate Nexus RMGI?
- Yes. If stored in a cooler, allow the product to reach room temperature prior to use.
Are there any detrimental effects to storing the product at high temperatures?
- Ambient temperatures greater than 25°C (77°F) may reduce shelf life.
Do I have to cap syringe after use?
- Yes. Do not allow the pastes to dry out. Store with cap securely attached to the syringe. Leaving a used mixing tip on the syringe as a cap until the next application may result in evaporation and drying of the paste (not recommended).
Can this product have adverse effects on the patient?
- Yes, uncured methacrylate resin may cause contact dermatitis and damage the pulp for some patients. Avoid contact with skin, eyes and soft tissue. Wash thoroughly with water after contact. Get medical attention for eyes. Do not take internally.
What makes Nexus RMGI adhere better to dentin, enamel and substrates than leading RMGIs?
- Nexus RMGI utilizes a unique dual adhesive system to achieve enhanced bond strength to tooth structure (dentin/enamel) and other dental substrates.
How soon can I light-cure Nexus RMGI to hasten its gel state?
- You can light-cure (1-2 seconds) Nexus RMGI immediately after placement to hasten gel state or you can also allow Nexus RMGI to self-cure (minimum of 1.5’) to reach its gel state.
- Prepare tooth in usual manner.
- For pulp capping use calcium hydroxide or other suitable pulp capping material. Remove provisional restoration.
- Clean the preparation with pumice and water. Rinse thoroughly with water. Air dry preparation (do not desiccate).
- The preparation or cavity should be just dry enough that the surface has a slightly glossy appearance. Over drying can lead to post-operative sensitivity.
- Try in restoration to ensure proper fit. Adjust if needed. Thoroughly clean the bonding surfaces of the restoration.
- Remove the syringe from the foil pouch. Note the date the syringe was removed on the syringe label.
- Remove the sealing cap from the syringe. Check the syringe openings for blockage; remove any paste plugs. Before the first use or after a long interval between uses, squeeze out a small quantity of paste onto a pad to equalize the base and catalyst paste in the syringe.
- Discard the paste which has been squeezed out. Attach a new mixing tip and secure it by turning it to the right. Squeeze out and discard a peppercorn-size quantity until an evenly mixed paste in a homogenous color flows out of the tip.
- The paste requires a certain amount of time to flow through the mixing tip.
- The flow through speed cannot be accelerated by increasing the pressure on the plunger. As soon as the pressure on the plunger decreases, the material flow stops and the paste begins to set up.
- Do not use force to press out paste that has set as this could cause damage to the mixing tip and the syringe.
- Dispensing of the material can be done as follows:
- Inlay/Onlay – Dispense the cement directly into the cavity preparation covering all surfaces. Seat the restoration gently onto the tooth prep, allowing the cement to flow from all sides.


