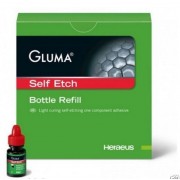
One Step-reliability: The reliability and qualities of GLUMA Self Etch is proven by many studies and test results. The innovative formula of GLUMA Self Etch support the excellent bond strength and supreme marginal sealing. And it allows treatments even in hypersensitive areas.
One Step-effectiveness: GLUMA Self Etch allows you to apply just one layer for etching, priming,bonding plus desensitizing. GLUMA Self Etch system is immediately effective. Being a ready-to-use one step adhesive, no prior mixing, no shaking, no etching, no fridge storage is necessary.
One Step-safety: The chemistry of GLUMA Self Etch allows you to have maximum error avoiding application, even treating hyperactive patients. Just one application step avoids unexpected treatment failures.
One Step – convenience: GLUMA Self Etch is a ready-to-use one-step adhesive. No prior mixing, no shaking, no etching, no fridge storage is necessary.
Minimum preparation time
- GLUMA Self Etch system is immediately effective.
Minimum failures
- Just one application step which avoids unexpected treatment failures
Minimum sensitivity
- The GLUMA Self Etch formula allows treatments even in hypersensitive areas.
Application
1. Bonding of direct light-cured composite restorations (including Polyglas® and compomers)
1.1. Preparation
- Clean tooth with an oil and fluoride-free polishing paste
- Prepare cavity for bonding. • Rinse cavity with water and air dry
- Isolate the cavity (the use of a rubber dam is strongly recommended)
- If indicated, place sub-base (e. g. glass ionomer cement)
-
1.2. Dispensing
Bottle application:
- Dispense GLUMA Self Etch into the well (1 drop for small cavities, 2 drops for larger cavities)
- Replace bottle cap immediately after dispensing
- Use GLUMA Self Etch immediately after dispensing (no later than 3 minutes)
-
Single dose application:
- Make sure that the single dose is opened immediately prior to application
- When removing the liquid rotate the applicator tip or brush briefly in the single dose.
-
1.3. Application
NOTE: Roughen or grind enamel before application of GLUMA Self Etch. Etching/bonding is less effective on unground enamel. On sclerotic dentine separate etching with phosphoric acid for 30 sec is recommended.
- Immediately after dispensing apply a copious amount of GLUMA Self Etch to the entire cavity surface and margin with the applicator tip or brush. Make sure that the cavity margin is also sufficiently coated with GLUMA Self Etch liquid
- After application agitate the adhesive slightly for 20 sec. Agitation during the dwell time improves demineralisation and diffusion. Protect the bonding layer from contamination (e. g. by blood or saliva)
- Carefully air-dry GLUMA Self Etch with a flow of oil-free air (may take 5 – 10 sec or longer depending on the geometry of the cavity). The objective is to evaporate the solvent and water from the bonding layer without removing the active ingredients from the tooth surface.
-
NOTE: A strong air stream at the start of air-drying will dilute the bonding agent and may result in poor adhesion.
- The surface must be visibly glossy, both after application of GLUMA Self Etch and after evaporation of the solvent. The complete cavity surface must be fully coated. If the cavity surface does not appear shiny, apply GLUMA Self Etch as described above a second time
- Light-activate GLUMA Self Etch for 20 sec with a halogen or LED light-curing unit. The lightcuring time assumes the use of a Kulzer Translux® light-curing unit or other dental curing light of comparable intensity (min. 400 – 500 mW/cm2 ). If plasma light-curing units (with an output greater than 1200 mW/cm2 ) are used, the curing time can be reduced by 8 sec
-
NOTE: Low-intensity light causes poor adhesion. Curing lights should be checked with reliable light testers at regular intervals. The emitting tip should be placed as close as possible to the curing surface.
- Place restorative material as required
-


