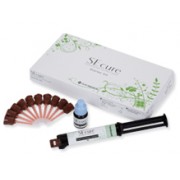
SEcure is a self-etching, dual-cure resin cement for onlays, inlays, crowns and bridges. It contains 4-META*, a high performance adhesive monomer that creates excellent bonds to dentin and enamel by virtue of formation of a hybrid layer. Chemically SEcure is a resin cement and thus water resistant. Removal of excess resin is quick and easy. The cement is radiopaque. The pretreatment with V-PRIMER for precious metals and Porcelain Liner M for porcelain will further enhance the bond strength and its durability. * 4-methacryloxyethyl trimellitate anhydride 1
ADVANTAGES:
INDICATIONS:
Luting of all kinds of Crowns & Bridges
TECHNICAL DATA:
Tensile Bond Strength :
Shear Bond Strength:
Curing Time:
SECURE is dual-cure cement , so it's completely reliable even where a curing light does not reach e.g under PFM crowns, down post-holes.
Light cure: 20 secs
Self cure : 3 mins
Safety Instructions
Sensitivity
SEcure should not be used by clinicians or on patients who are sensitive to methacrylates or resin cements. If signs of irritation such as redness appear, stop using SEcure immediately and consult a physician.
Avoid contact
Avoid contacting soft tissues, skin or eyes by SEcure components. The use of rubber dam is recommended. Contaminated skin or mucosa should be wiped immediately with alcohol and then rinsed thoroughly with copious amounts of running water. If SEcure components enter the eye, rinse immediately and thoroughly with running water and have the patient examined by an ophthalmologist. Clinicians should use dental gloves.
Pulp protection
If the preparation approaches the pulp, apply a protective liner or base.
Flammability
The Primer is flammable. Keep away from open flame in use and storage.
Applications
Only use SEcure for the applications recommended in these instructions.
Storage conditions
The kit should be stored IN A REFRIGERATOR. High temperature and direct sunlight will shorten their shelf-life.
Avoid Contamination
To avoid contamination, do not mix the components with other materials. Firmly recap the containers immediately after use. After the cementing procedure, dispose of any excess of mixed materials. Once dispensed do not return materials to the containers
Surface preparation
1) Tooth Surface
Clean cavity/preparation, wash with water and dry with oil-free air. (A rubber dam is highly recommended to reduce the chance of contamination by saliva,breath humidity or blood.)
Then apply the Primer to the tooth surface. After 20 seconds, spread the primer by gentle air blow to make the thin film and looks shiny surface.
2) Restoration Surface
To the extent practically possible, the surface of a restoration to be bonded should be abraded using a sand-blaster or roughened by a round bur. Rinse thoroughly and dry. Then, depending on the restorative material, the roughened and cleaned surface may be treated with a surface modifier, such as Porcelain Liner M for porcelain or V-PRIMER for precious metals, to get higher bond strength and durability.
Mixing and application of the cement
• Important : Remove sealing cap from the dual-barrel cartridge and express a small amount of base and catalyst until they flow equally from both orifices. • Attach and lock a mixing tip onto the cartridge and express a small amount of mixed material to confirm good flow and mixture.
• Apply the mixture to the surfaces of the prepared tooth and/or the restoration.
• Carefully wipe the orifices and re-seal cartridge taking care to align the V on the cap with the notch on the cartridge collar. This will assure that the proper plugs fit the holes. (If the plugs are reversed, the cement may set in the syringe.) Note : The mixture should be used within 30 seconds of mixing.
Cementing, setting and finishing
• Insert the restoration immediately after the application of the cement. After confirming that it is completely seated, hold it under pressure in position until the cement sets. • To remove the excess cement, irradiate the excess with visible light for 1 - 2 seconds and immediately remove it. Or, alternatively without light, remove the excess on the halfway to setting, specifically 1.5 - 2 minutes after cementing.
• The final setting time is approximately 5 minutes in the mouth, thereafter polish the cement line or adjust occlusion according to normal practices.
Option : Light-setting
If the restoration is translucent like porcelain or cured composite resin, light-setting may be opted. In this case, irradiate visible light first for 1 - 2 seconds, remove the excess cement, and then irradiate the light another 20seconds for the final setting.


